This article will describe all the components of the Unbounce Platform once logged in to app.unbounce.com.
Top Header
On the top of the Unbounce Platform, you'll notice information relating to your traffic allocations, account, and more:

Clients tab
Clients are sub-folders in the same Unbounce account; it allows you to segment pages into different subcategories easily:

Use this drop-down menu to switch between other Clients.
To learn more about Clients, see our documentation: Working with Clients.
Traffic Allocations, Account Management, and Support
Here, you can locate your monthly traffic allocations for your landing pages. In this example, the number of monthly visitors allocated for this account is 500,000, and so far, there have been 1,317 visitors:

Click the question mark icon (?) to contact our Support team. See How Do I Contact the Support Team? to learn more.
Click the Account Management button to view all information relating to your account, such as your subscription plan details, billing information, Users, Clients, and more: Managing Your Account.
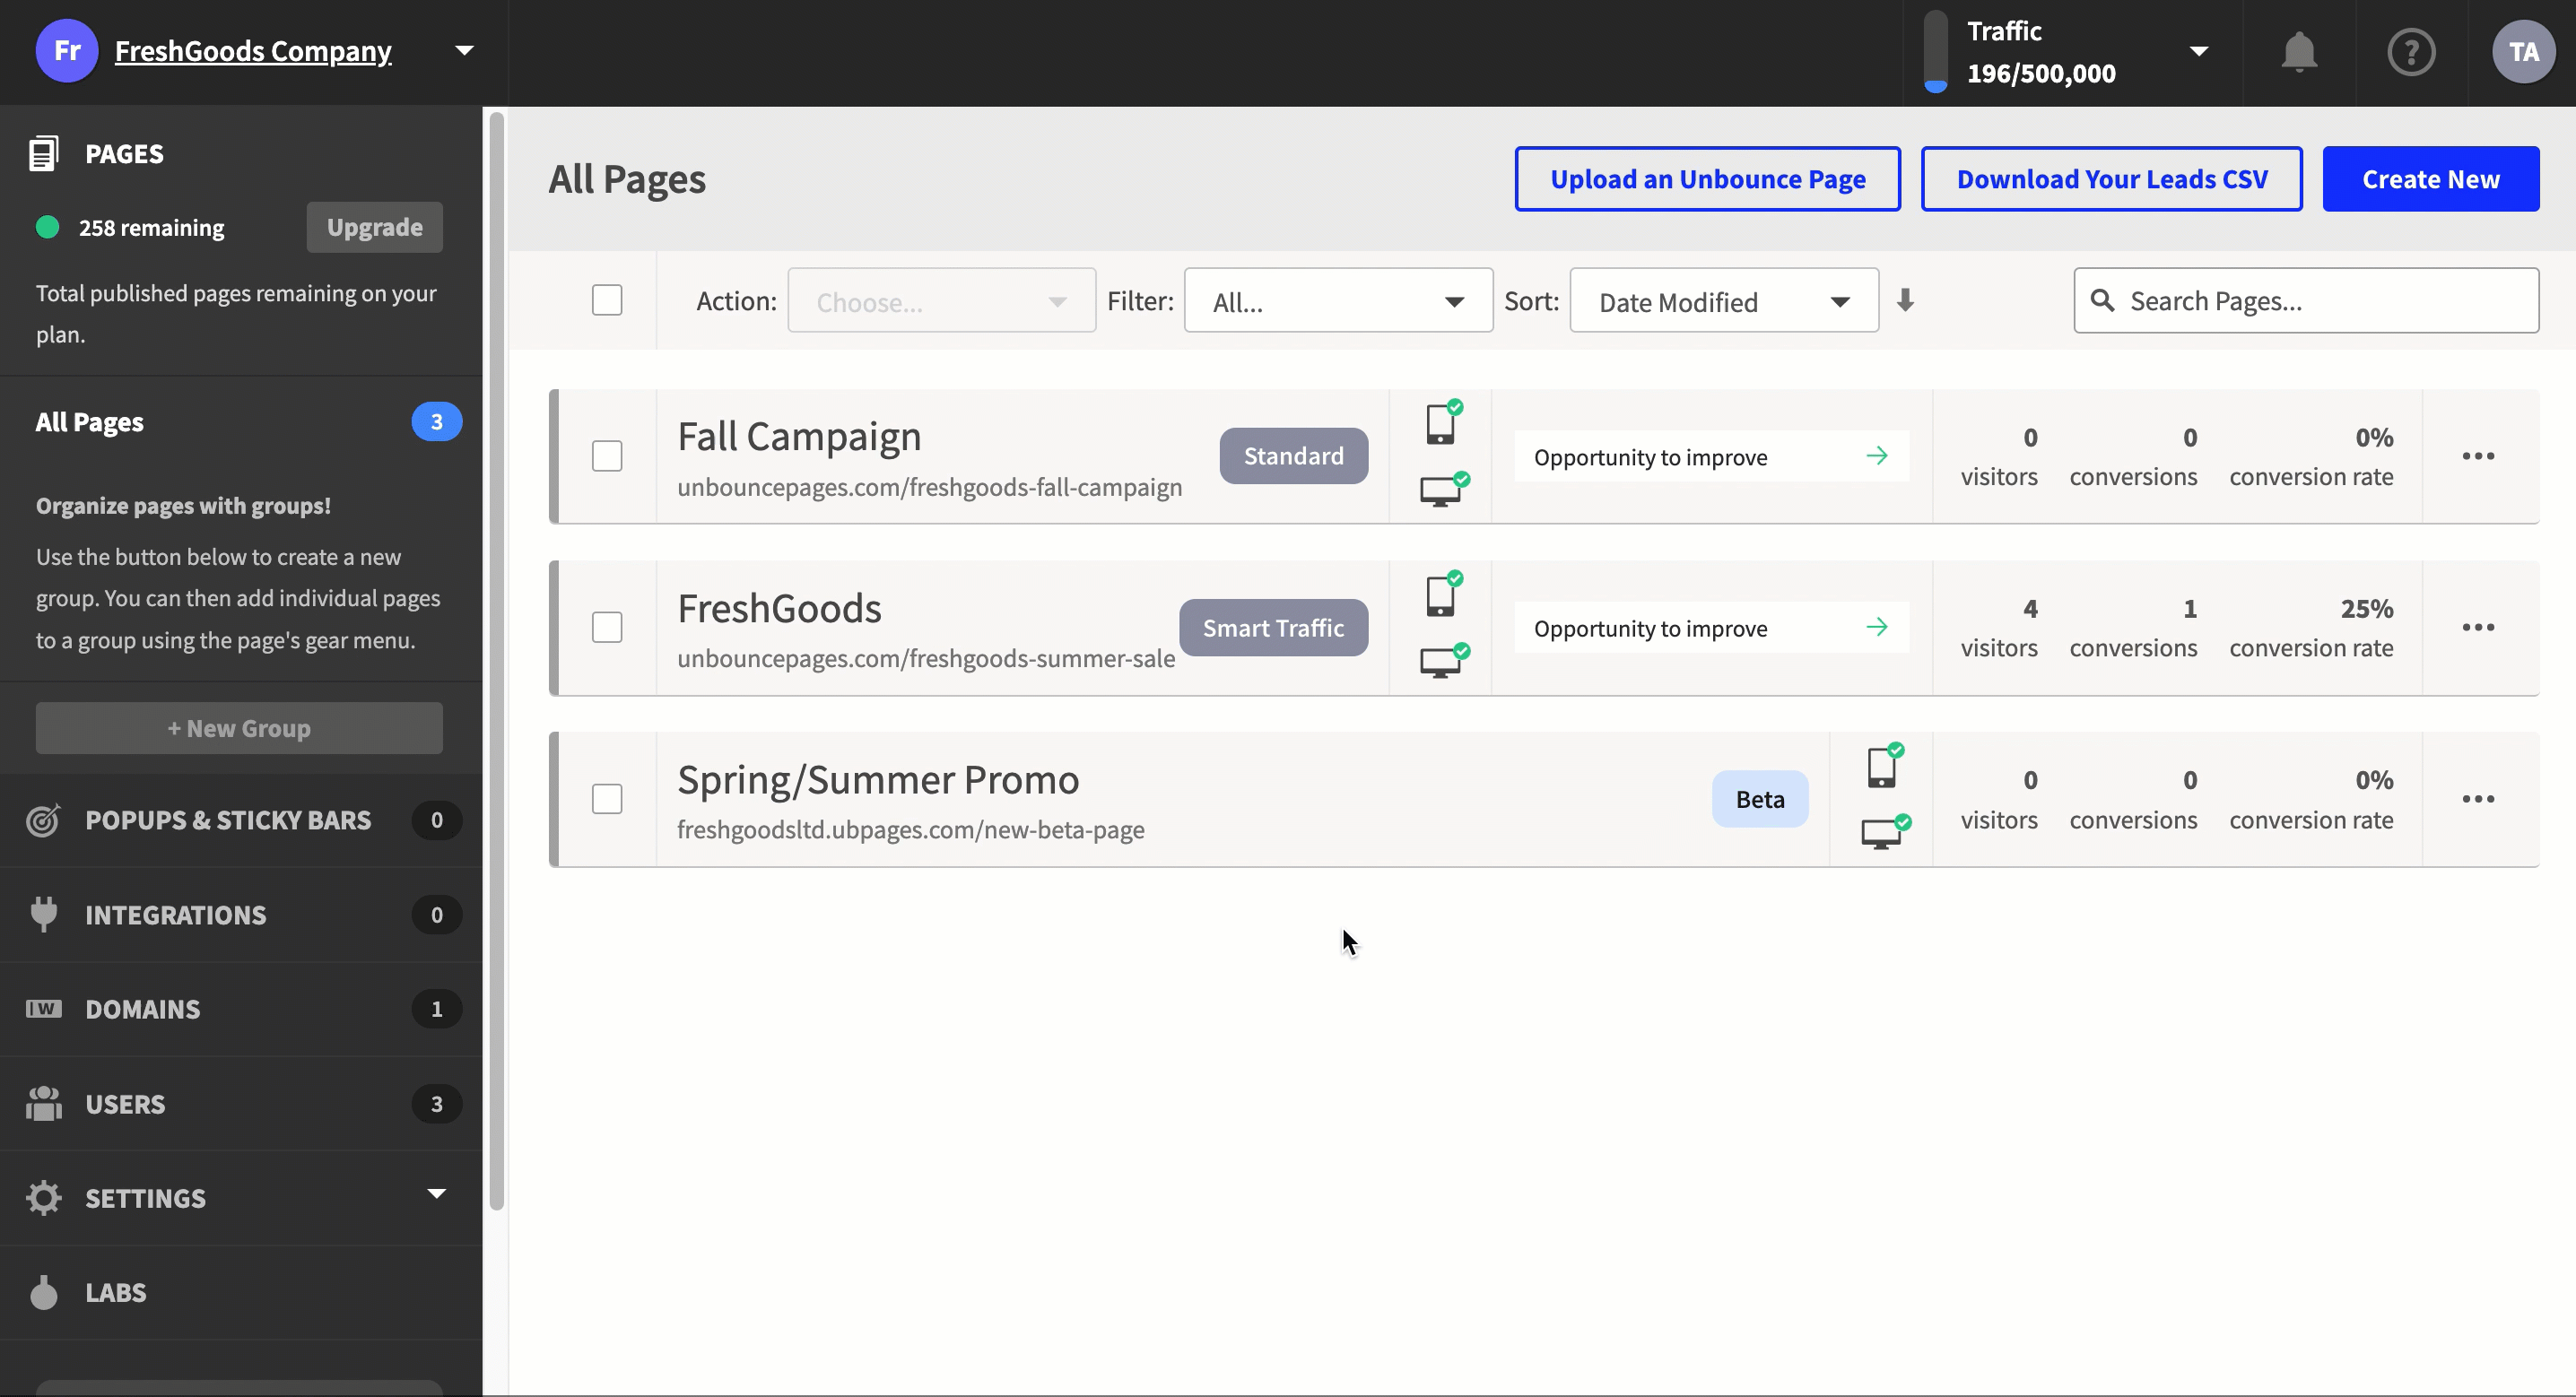
Viewing All Pages (All Pages Screen)
Once you log in, a page with a curated list of all your pages will appear.
You can navigate back to this list of pages by clicking the Pages button on the left-hand side of the Unbounce Platform:

You can perform bulk actions from the All Pages screen, such as publishing or unpublishing pages, set filters to view certain pages, and more.
You can also group your pages to help you better organize your content based on campaigns, industry, page purpose, etc. See Grouping Your Pages to learn more.
If you click on a page, the Page Overview screen will appear.
About the Page Overview
Click on a page from the All Pages screen to launch the Page Overview:
Here, you will see additional tabs relating to your landing page.
Overview Tab

The Overview tab provides detailed insight into your landing page, such as page views, visitors, or conversions.
To learn more about the Page Overview, see our documentation: What is the Page Overview?
You can also enable testing features like Smart Traffic or A/B testing from the Page Overview.
Leads Tab
Click the Leads table to see leads collected for this page:
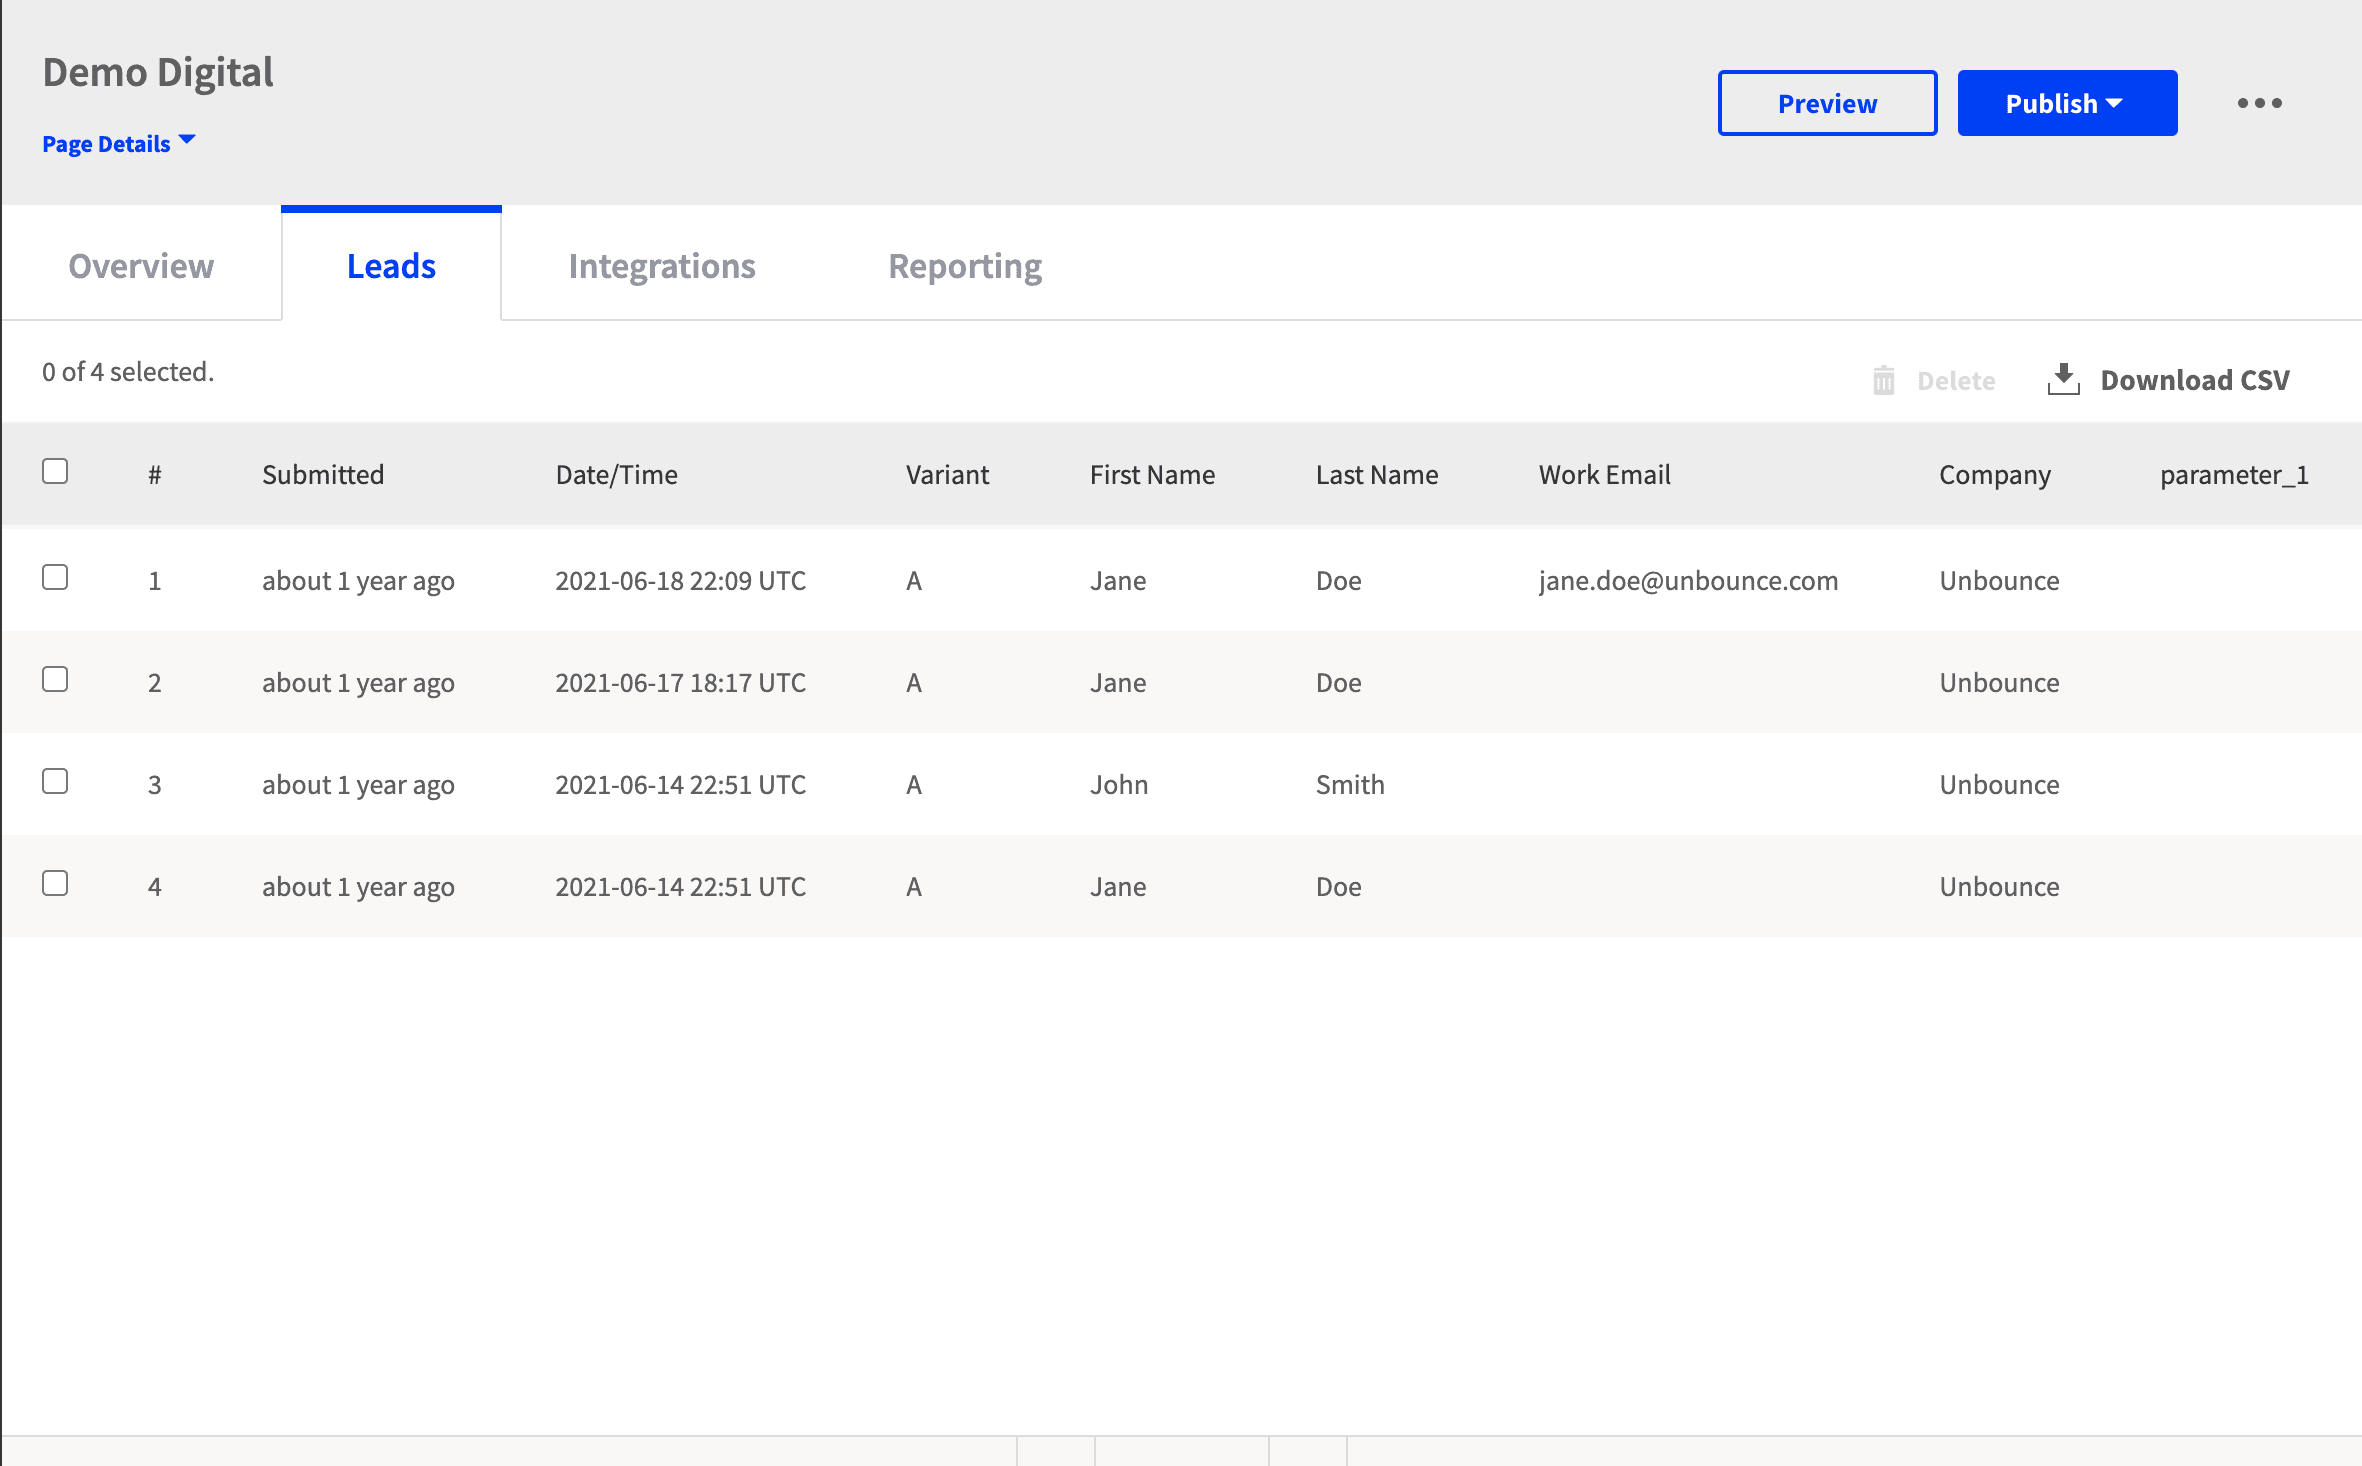
See Getting Your Leads for more information.
Integrations Tab
Integrations work to send lead information from your landing page to a third-party CRM or app of yours, such as HubSpot, Mailchimp, a custom endpoint URL via a Webhook, and more.
Set up or view integrations for your landing page from the Integrations tab:

See Integrating with Unbounce for a list of Integrations and setup instructions.
Reporting Tab
If you've enabled Smart Traffic on your landing page, you'll have access to more granular data about the performance of your landing page:
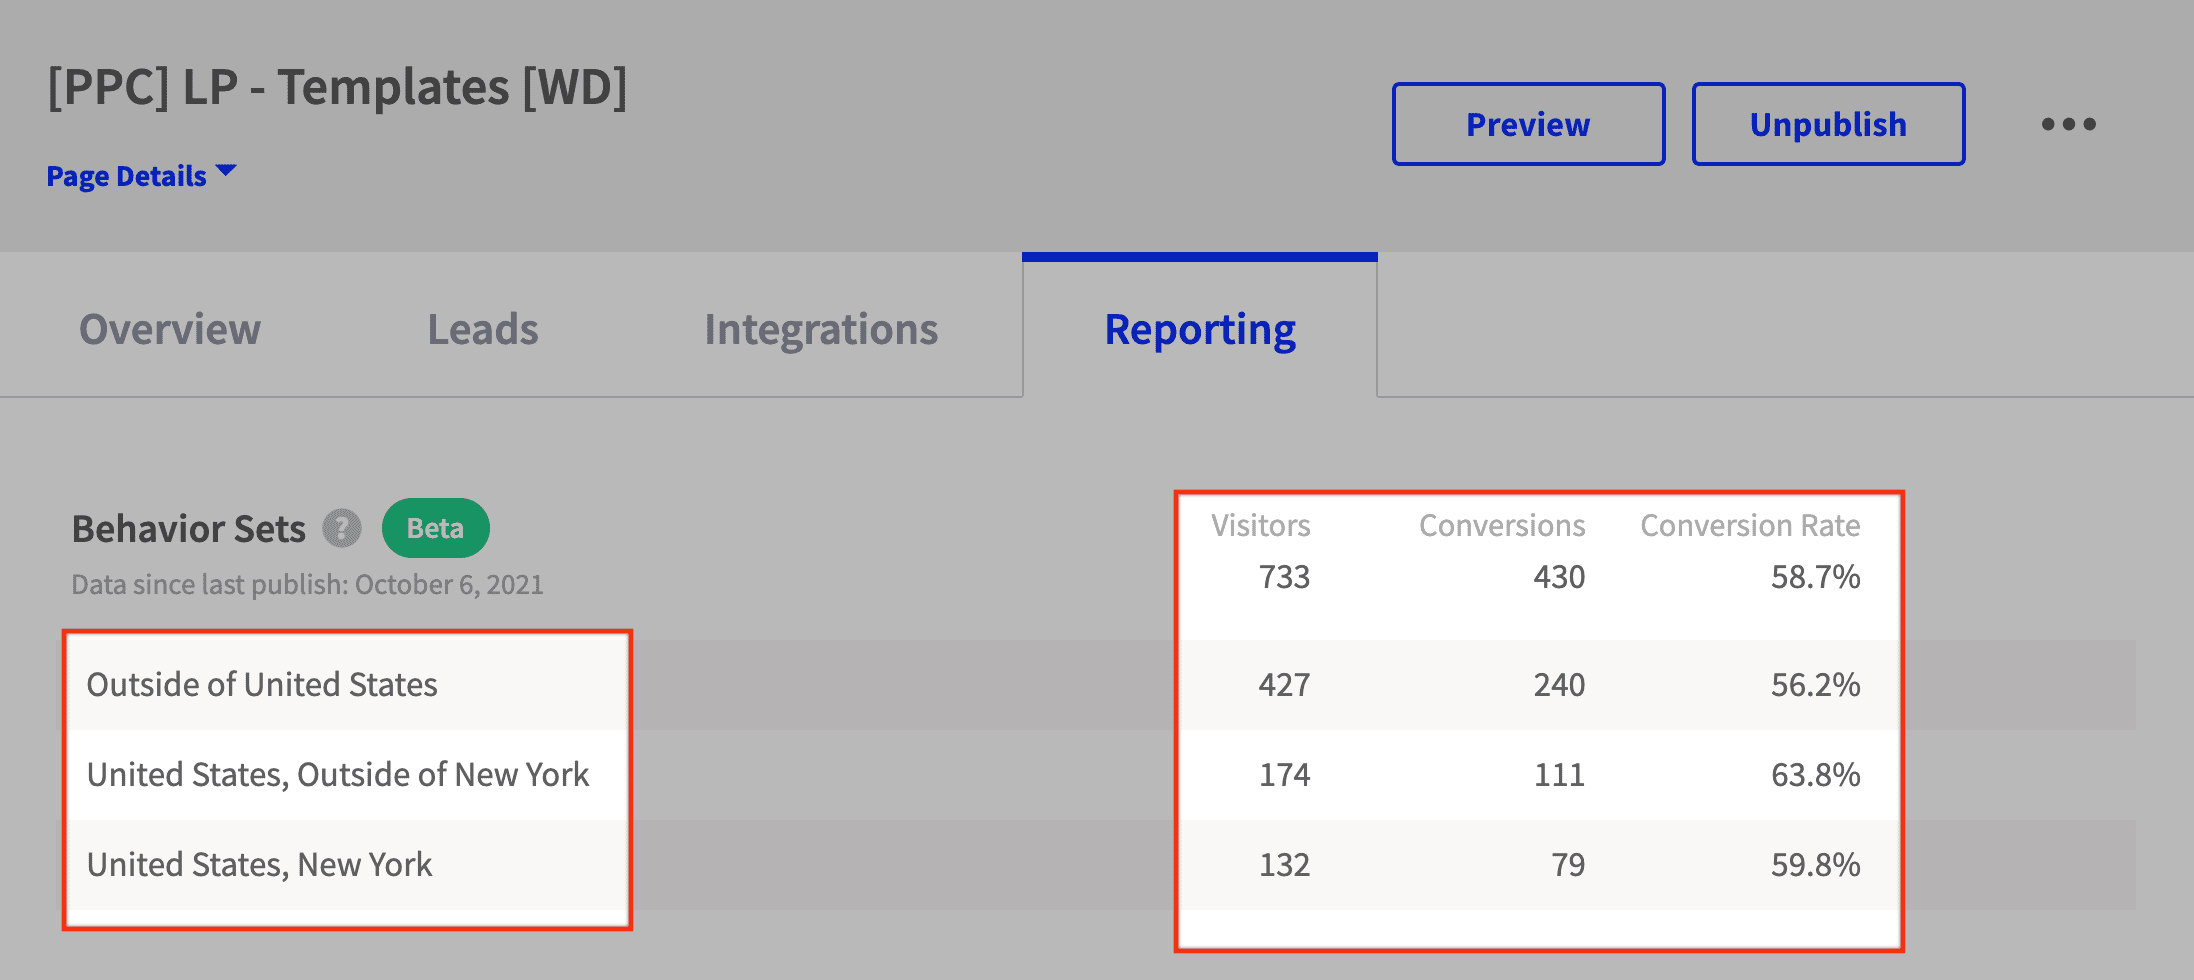
See the following resources to learn more:
Analyzing Reports from Smart Traffic Behavior Sets.
Popups and Sticky Bars Page
On the left-hand side of the Unbounce Platform, click the Popups & Sticky Bars button:

Here is where you can see existing popups & sticky bars, or create new ones.
Click on a popup or sticky bar from the list to launch the Popups & Sticky Bars Overview page:

To learn more about popups & sticky bars, this resource:
Working with Popups & Sticky Bars.
Integrations Page
On the left-hand side of the Unbounce Platform, click the Integrations button:

Here, you will see a list of all integrations you've embedded onto your landing pages or other available integrations.
To help you get started, see a list of available Integrations in Unbounce, and review the following documentation: Unbounce Integrations.
Domains Page
On the left-hand side of the Unbounce Platform, click the Domains button:

You can set up your custom domain in Unbounce for this specific Client.
There are several ways to add a domain to Unbounce; the primary ways are via,
To learn more about domains, see these articles:
Why Should I Connect My Domain in Unbounce?
How Do I Add My Domain To Unbounce?
To enable SSL on your domain, see How Do I Secure my Landing Page Domain with SSL?
Users Page
On the left-hand side of the Unbounce Platform, click the Users button:

You can add different users with different permissions and roles. See Working with Users & User Role Permissions to learn more.
Settings Menu
Click the Settings button, and a drop-down of additional options will appear in the list:

Script Manager
Script Manager is a custom Unbounce feature that allows you to add custom scripts or code (JavaScript, CSS, tracking scripts from Google Analytics, Google Tag Manager, or other third-party apps) onto all pages simultaneously.
Script Manager saves you from navigating to each page to add custom scripts. See these articles to learn more:
Adding Your Custom Scripts Using Script Manager
Hiding your Pages From Search Engines with Script Manager
Embed Code
This page provides a quick & short-hand way to copy your embed code for your popup & sticky bar.
Note:
Within the same Unbounce Client, each popup & sticky bars will have the same embed code. So, you can have multiple sticky bars and popups, but the embed code is the same.
One single embed code is allocated per Client.
IP Filters
Adding an IP filter can help you exclude unwanted traffic or conversions from specific IP addresses.
For example, if you want to share the landing page with your team members, but don't want their visits or conversions to skew page data, you can filter their IP address.
Only Account Owners and Admin users can add IP filters to the Unbounce Client.
See our documentation on filtering IP addresses to learn more.
Email Notifications
Once you've set up the email notification integration for your landing page, you can customize the look and appearance of how lead notification emails deliver to subscribers. See Customizing New Lead Email Notifications to learn more.
Labs
Labs Features page is a fun & interactive way to check out current projects that Unbounce is working on.
See What are Labs Features? to learn more.