Meta has recently updated its requirements for pixel installation in response to Apple's iOS 14 update.
You can complete Meta's verification process directly in the Unbounce app by adding a meta tag to your custom domain (yes, directly in Unbounce!) using the Script Manager.
Once you retrieve the meta tag directly from Meta, it will look something like this:
<meta name="facebook-domain-verification" content="1a2b3c4d5e6f7g8h0i" />
This article will explain how to verify your domain in Meta with two steps: Adding your Meta tag to Unbounce, then publishing a page on that domain.
Adding your Meta Tag to Unbounce
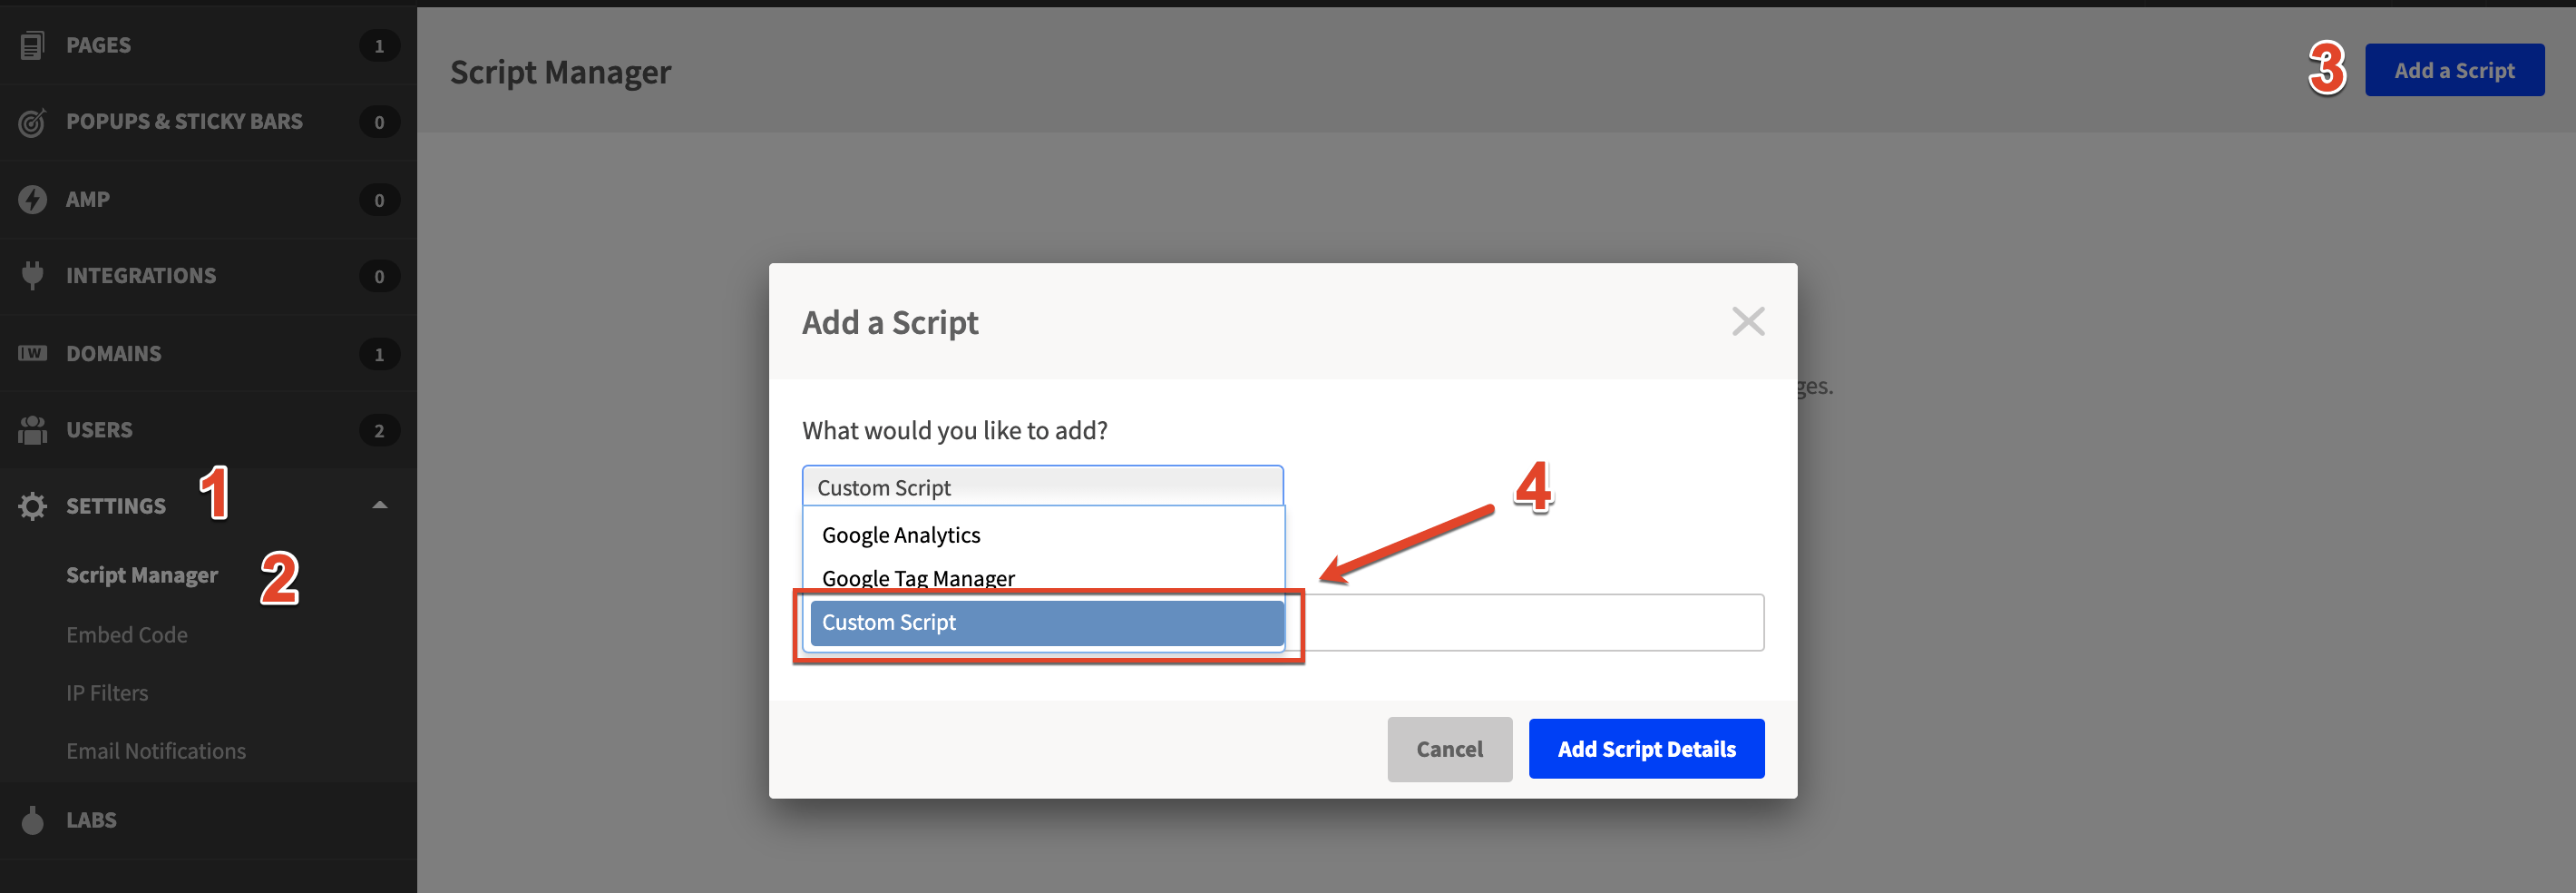
- Log in to Unbounce, and from the left-hand side menu, click Settings.
- From the drop-down menu, select Script Manager.
- Click the blue Add a Script button on the top-right-hand corner.
- From the pop-up, select a Custom Script from the drop-down menu, and give your script a name:
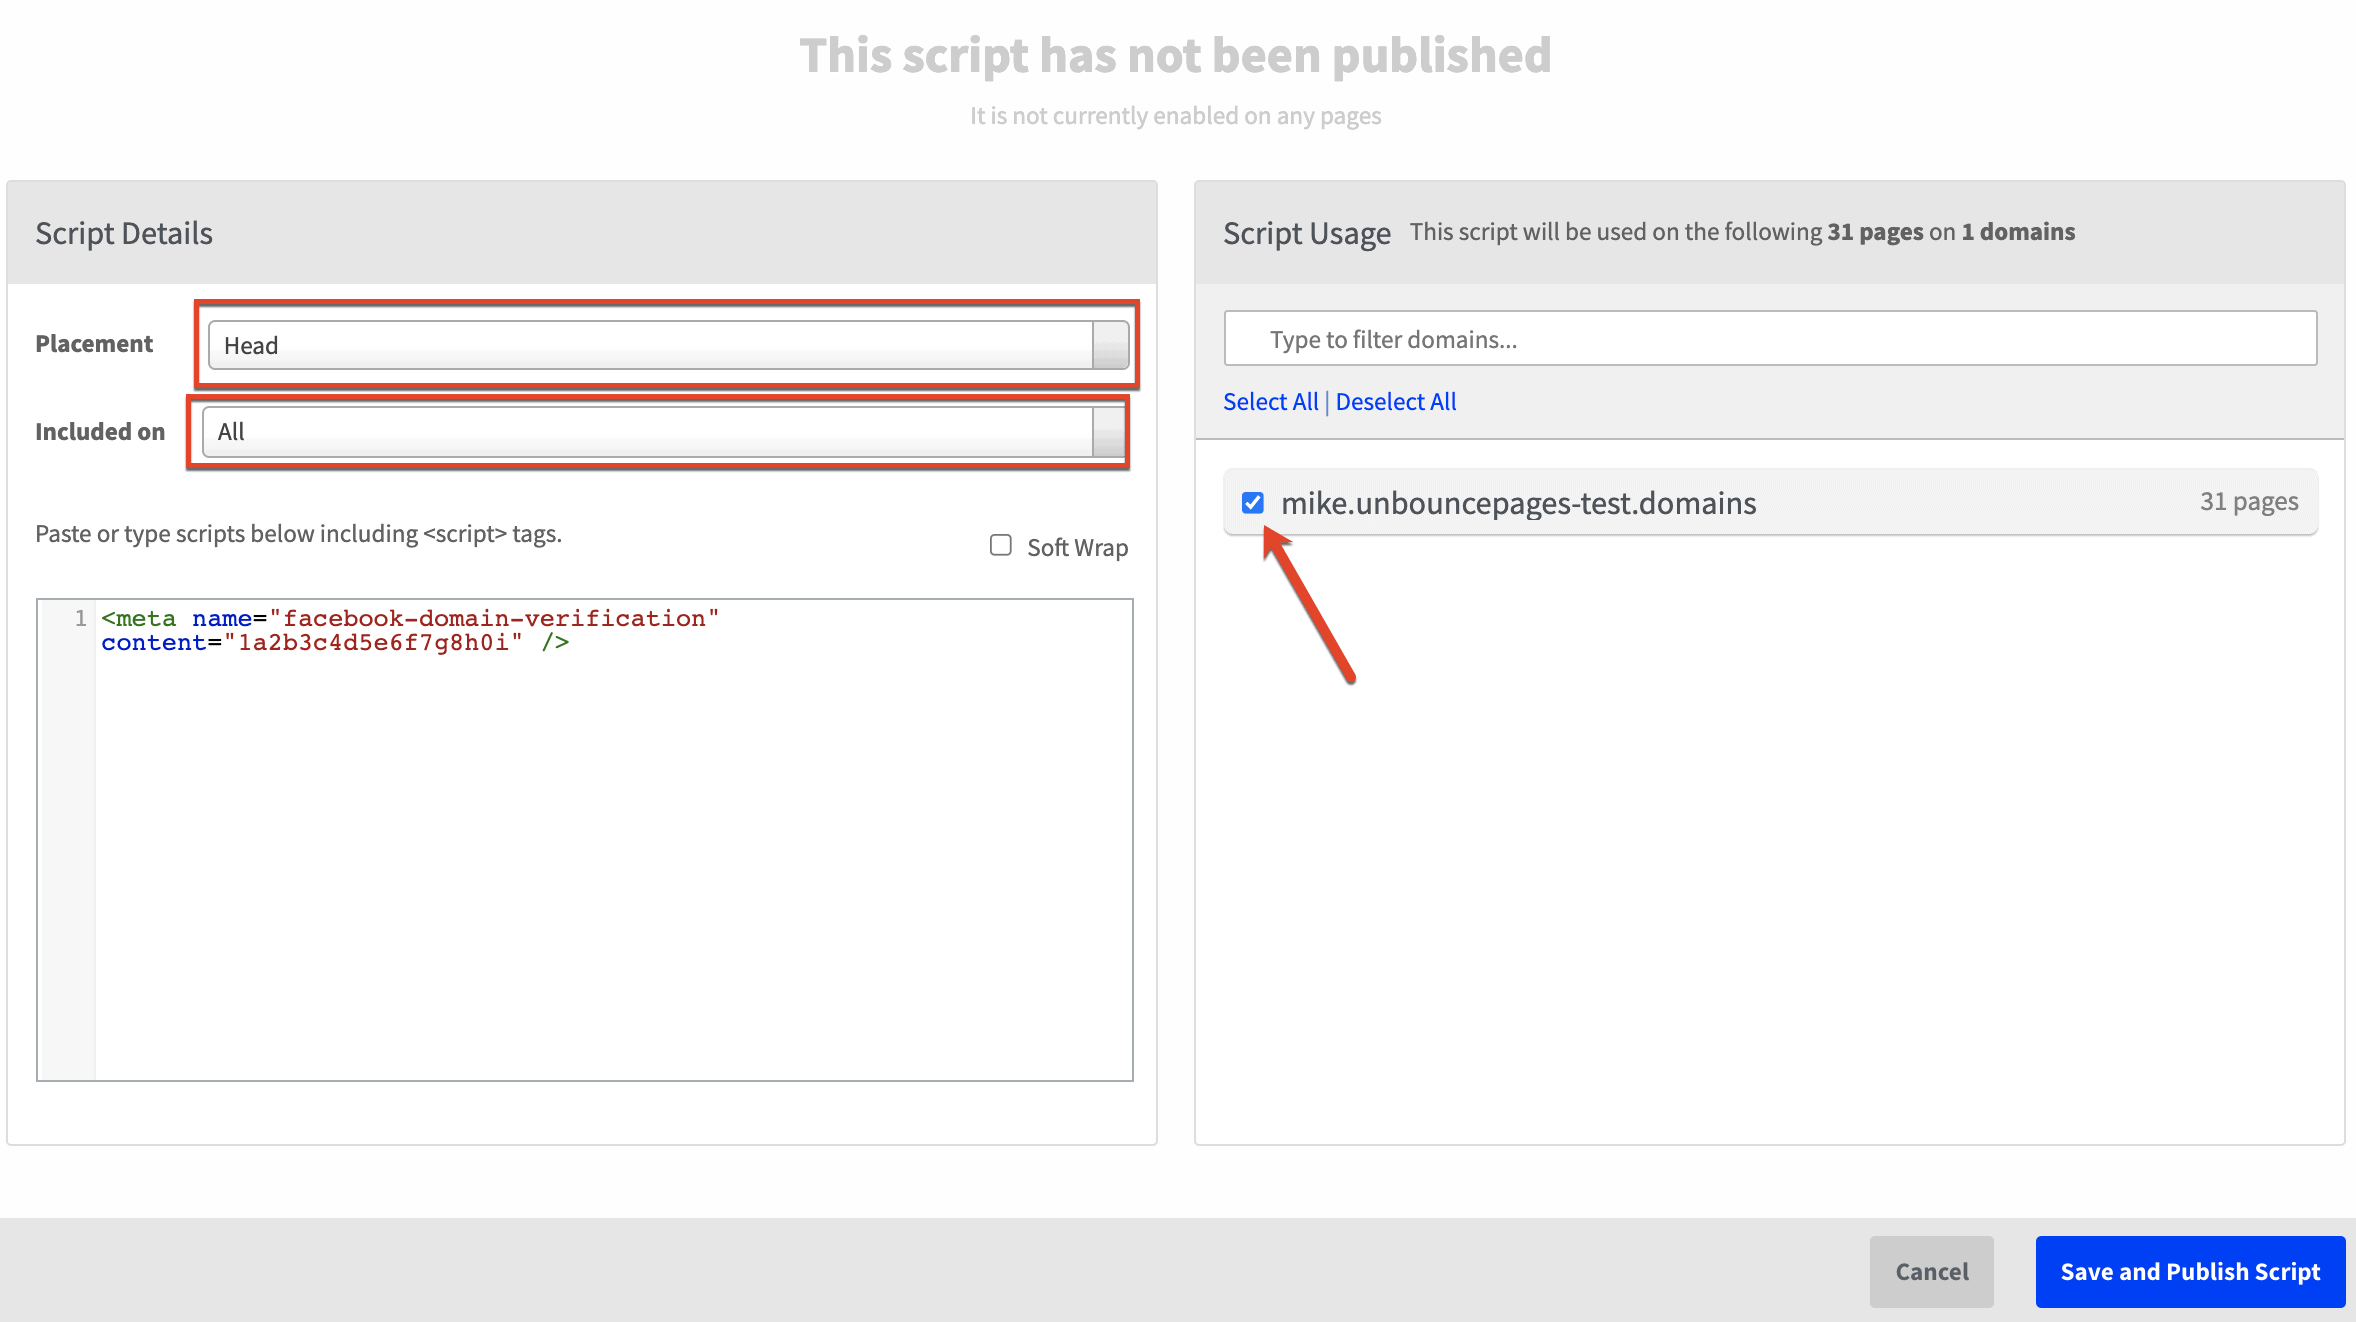
- Two panels will appear; update the fields with the following values:
- Within the Script Details tab, set the Placement to the Head, and the Included on value to All.
- Paste the meta tag script within the dialog box.
- In the Script Usage tab, select which subdomain(s) you'd like to apply the metatag script to:
Don't forget to hit Save and Publish Script.
Publishing a Page
For Meta to verify the domain, you must ensure that you publish a page on the domain you've placed the script on.
See our documentation on how to publish a page.
Once published, navigate to Meta and click the Verify button within the Meta Tag Verification tab for the domain.
Once the page is live with the working domain, your domain will verify in Meta.