Have you thought of tracking payments your visitors make through PayPal as conversions on your Unbounce landing page? Well, dream no more! Read below and make your wishes come true.
Your final workflow will look like this:

You will need to complete three main steps to get it all up and running:
- Adding the External Conversion Tracking script to your thank you page.
- Creating your PayPal Button.
- Linking your PayPal Button to your Unbounce landing page.
Adding the External Conversion Tracking script to your thank you page
- Create a landing page you would like your visitors to see as the final thank-you or confirmation page, following the payment process.
- Once created, open this page within the Unbounce builder.
- Within the Unbounce builder & navigate to the JavaScript widget at the bottom left-hand side of the builder:

- With the Placement set to Before Body End Tag, paste in the External Conversion Tracking script:
- Name your script, and click the blue Done button:
- Click the blue Done button, then Save and Republish your page.
- Make a note of your page's URL.
Creating your PayPal Button
- Log in to your PayPal account.
- Follow the steps in PayPal's documentation to create your custom PayPal Button (choose from the list of button styles).
- Within PayPal, complete Steps 1 through 2, which includes tips on customizing your button, filling in any appropriate billing info, tracking your inventory & profit, etc.
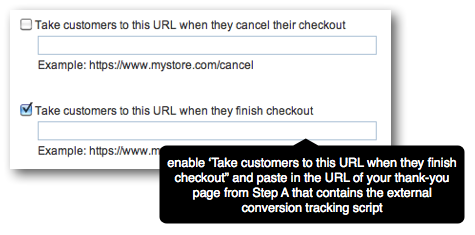
- Once completed, navigate to Step 3: customize advanced features.
- Enable Take customers to this URL when they finish checkout and enter the URL for the thank-you or confirmation page created in Step 1 above:
- Confirm your settings and click Create Button.
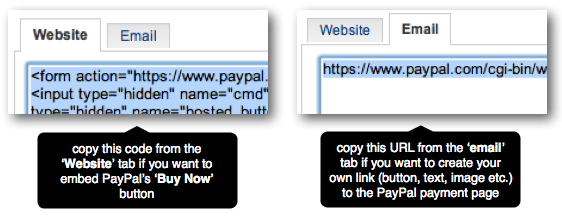
- This will take you to another page where you can grab the embed code for your button. You will have two options:
- Copy the code within the Website tab to embed PayPal's button or,
- Copy the URL within the Email tab to create your own link to the payment page
Linking your PayPal Button to your Unbounce landing page
Navigate back to the Unbounce app, and locate the page you'd like to set up with this custom PayPal button. Here, we'll add either the embed code or the email link.
Copying the code from the Website tab
We'll want to embed this snippet of code onto the landing page, using the HTML widget.
- Within the Unbounce builder, drag a new custom HTML widget onto your page:

- Within the HTML dialog box, paste in the script copied from the Website tab in PayPal and click Done.
- Resize the placeholder box to match the PayPal button's height and width and position it wherever you like on your landing page.
- Save & Republish the page (to preview these changes, Save your page and open up the Preview mode).
Copying the URL from the Email tab
- Within the Unbounce builder, drag a new button onto your page:

- With the button selected, navigate to the Properties panel on the right.
-
Set the button's Click Action to Go to URL, and paste the link retrieved from the Email tab in PayPal into the URL field:

- Feel free to make any customizations & changes to the design of your button.
- Save & Republish the page (to preview these changes, save your page and open up the Preview mode).
You're all set! You're now ready to start tracking your PayPal payments as conversions on your landing page!
Can I track PayPal Payments as conversions using an Unbounce form?
Yes! You can also use an Unbounce form to collect lead data and direct your leads to your PayPal page once they submit the form. Just set the form confirmation action to Go to URL and paste the above link into the URL field.
If you choose to do this, you may want to uncheck the form submit as a conversion goal so that you only count conversions when your visitors actually make their payment (see here for information on setting conversion goals).
Also, be advised that because Unbounce forms are not encrypted, you'll want to embed your form if you're collecting sensitive information like passwords or credit card information.