If you are based in the European Union [EU], Unbounce fully understands that you may be required to comply with the GDPR Cookie requirements.
Unbounce now allows a cookie banner feature that enables a cookie banner on your landing page. Therefore, your visitors can accept or reject cookie tracking on your landing page.
This article will explain how to enable a cookie banner on your page and how to update or change consent.
Enabling a Cookie Banner on Domains
To enable a cookie banner on all pages of a domain, follow these steps:
- Log into Unbounce.
- From the left-hand side menu, click the Settings tab. From the drop-down menu that appears, click Cookie Banner.
- The Cookie Banner page will appear.

- To enable a cookie banner on a domain, toggle the button next to the domain or toggle the cookie banner to show on all domains.

- Click Publish at the top-right-hand corner to save the changes:

Once published, the cookie banner will appear on pages and page paths tied to that domain.
Viewing your Cookie Banner
To test, navigate back to your live landing page. The cookie consent banner will appear at the bottom of the page: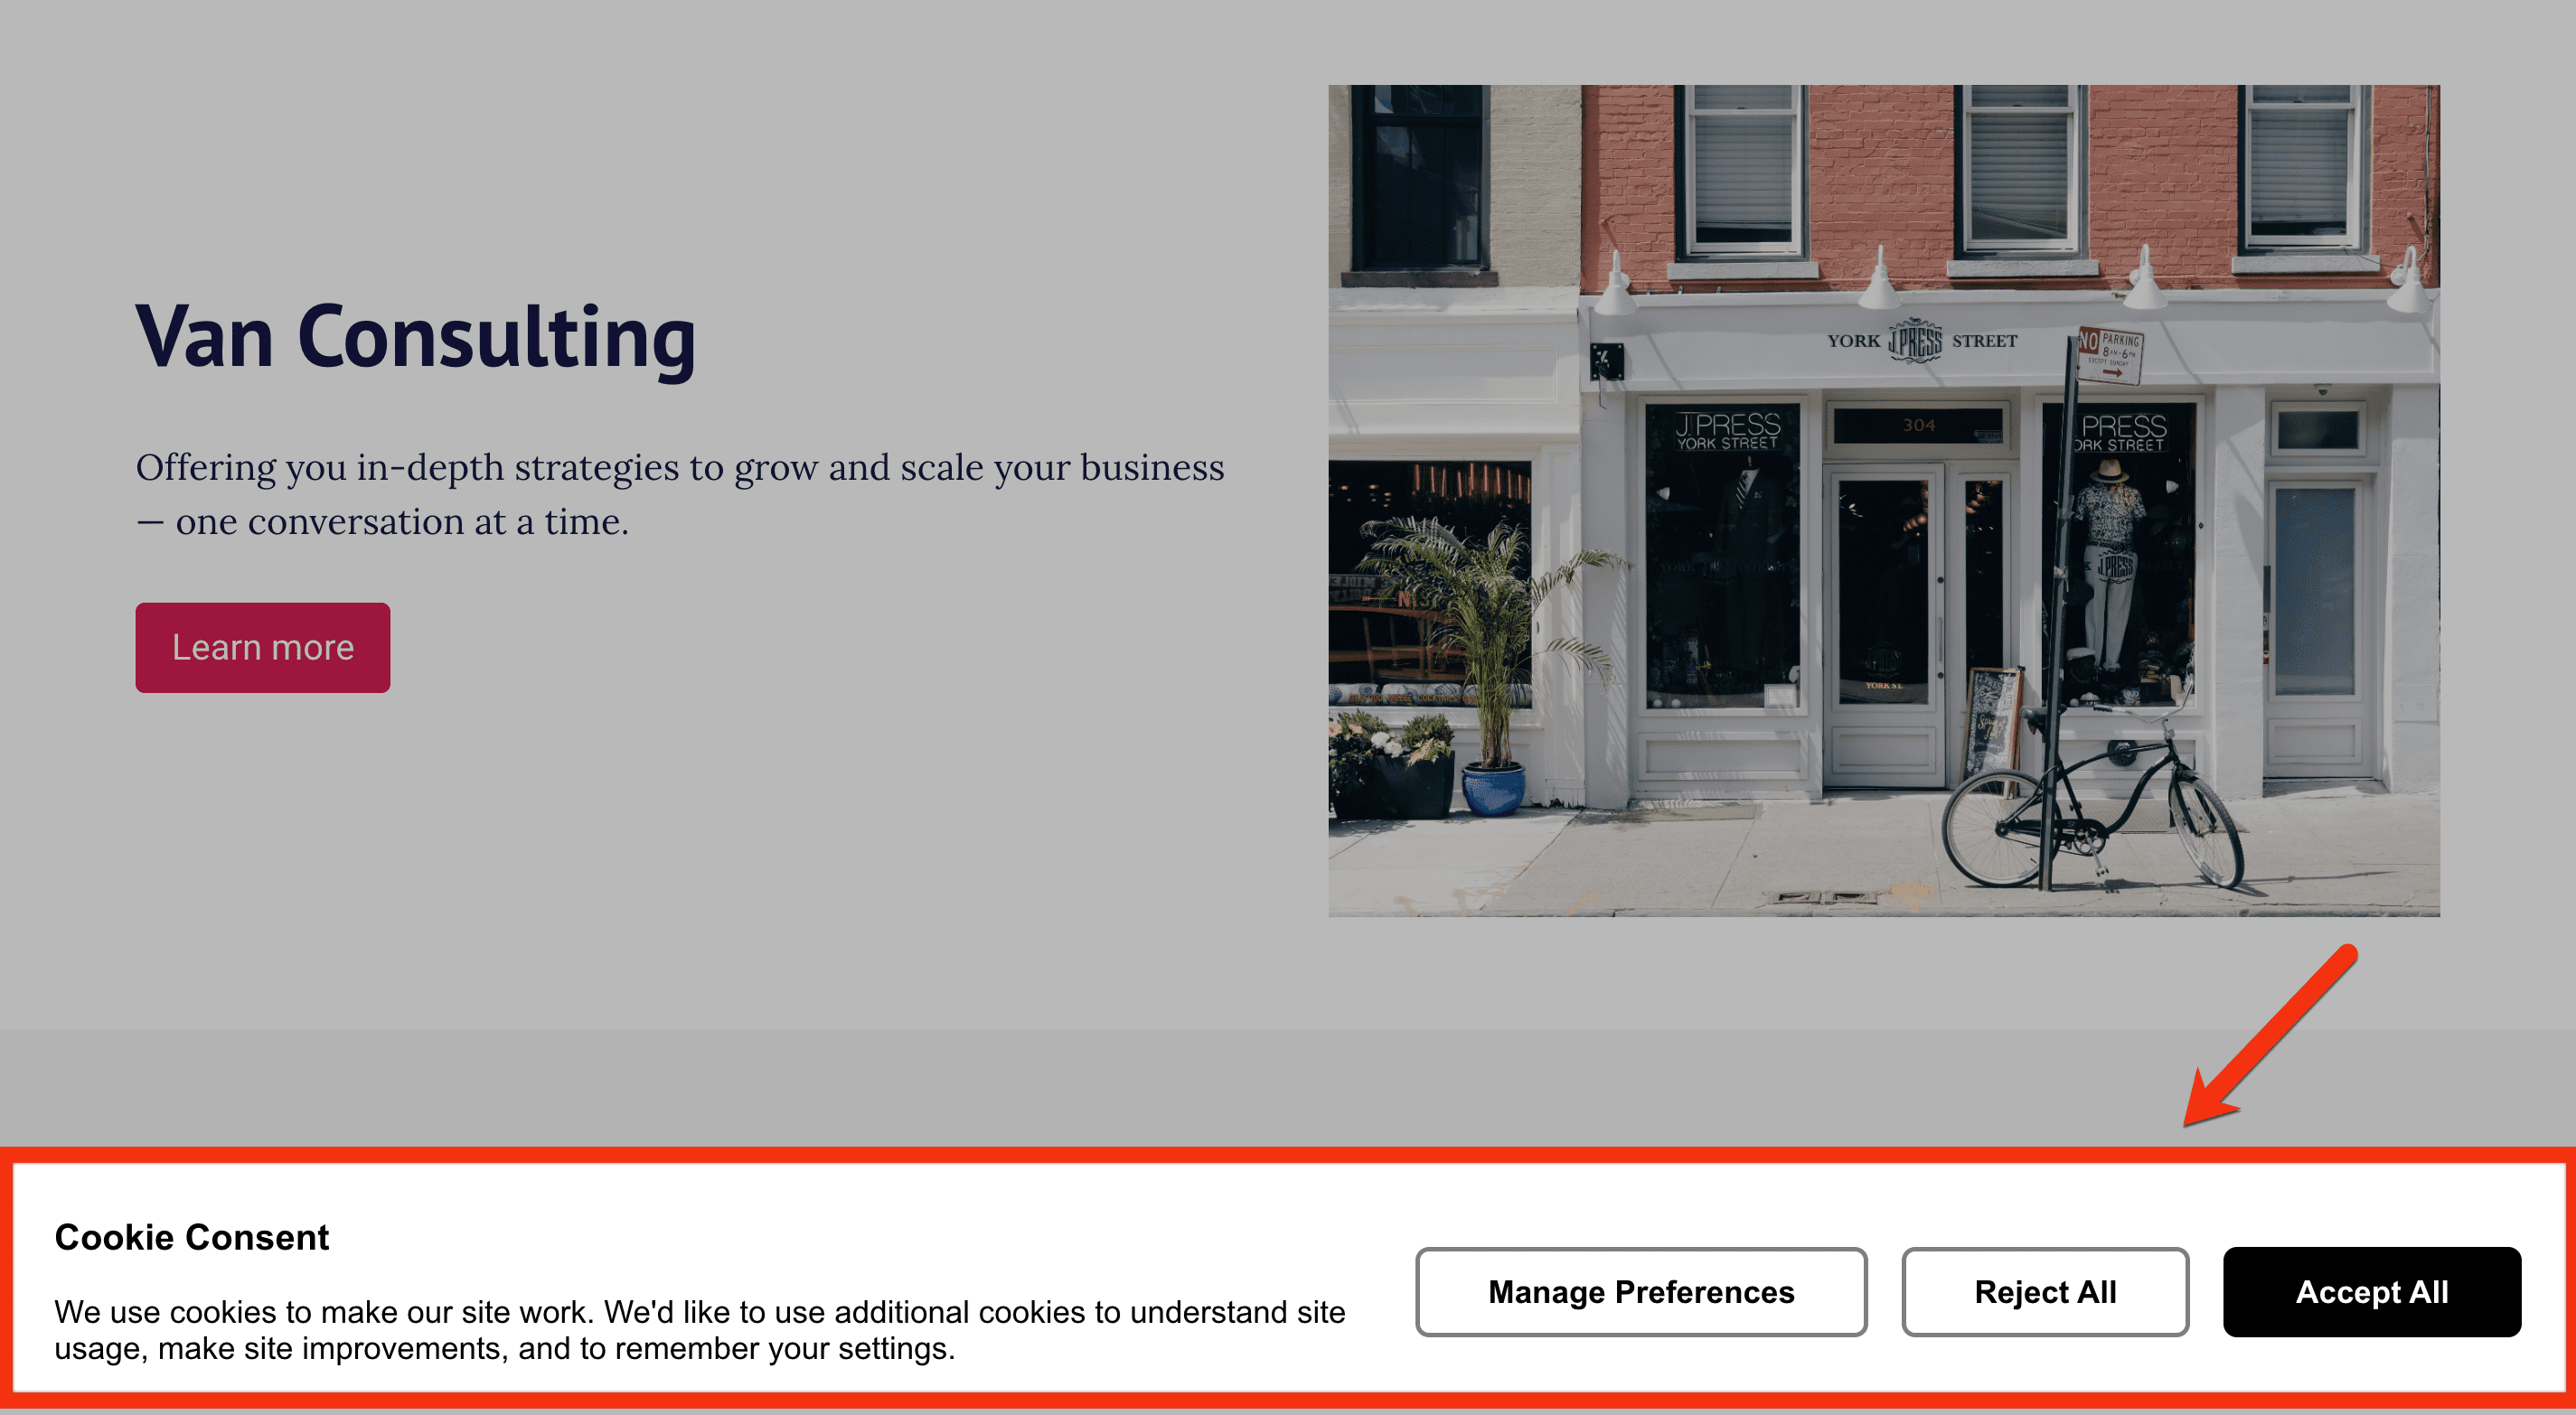
Customers have the option to Accept All, Reject All, or Manage Preferences.
Change Consent on a Cookie Banner
Your page visitors can opt out of cookies or change the permissions of how cookies track on their page. In other words, they can withdraw from the previously provided consent.
To do so, you'll need to add an anchor link (#cookie_banner_open) to a button or link to your page, which will relaunch the cookie consent banner.
Your visitors can then select to reject or allow certain cookies again.
Steps for Classic Builder
- Navigate to your page in Classic Builder.
- Add text or a button that you're customers can click to relaunch the cookie banner.
For text links,
- Double-click the text in the Classic Builder.
- The Style & Action section will appear within the Properties tab on the right-hand side.
- Click the Action tab.
- Under the Action drop-down, select Go to URL.
- As the URL, paste #cookie_banner_open.
- Under the Target drop-down, select Same tab or window.

For button links,
- Single-click the button in the Classic Builder.
- The Click Actions section will appear within the Properties tab on the right-hand side.
- Under the Action drop-down, select Go to URL
- As the URL, paste #cookie_banner_open.
- Under the Target drop-down, select Same tab or window.

Click Save at the top right-hand corner of Classic Builder. To test, Republish your page, and click the text link or button from the live page:
Steps for Smart Builder
- Navigate to your page in Smart Builder.
- Locate the button or text you want to relaunch with the cookie banner; in this case, it's the Manage Cookies button.
- Single-click the link and click Link Settings
 .
.
- To learn how to change an element to a link element, take a look at this article: How to Change Elements.
- Set the Link To address to Web Address. In the URL field, paste #cookie_banner_open:

- Be sure to set the Target as Open in current window.
- Save and republish the page; the cookie banner will appear in Smart Builder once visitors click the link:

Adding a Link to a Privacy Policy page
Want to direct your visitors to your organization's privacy policy page? You can add a link to your privacy policy page directly in the cookie banner messaging: 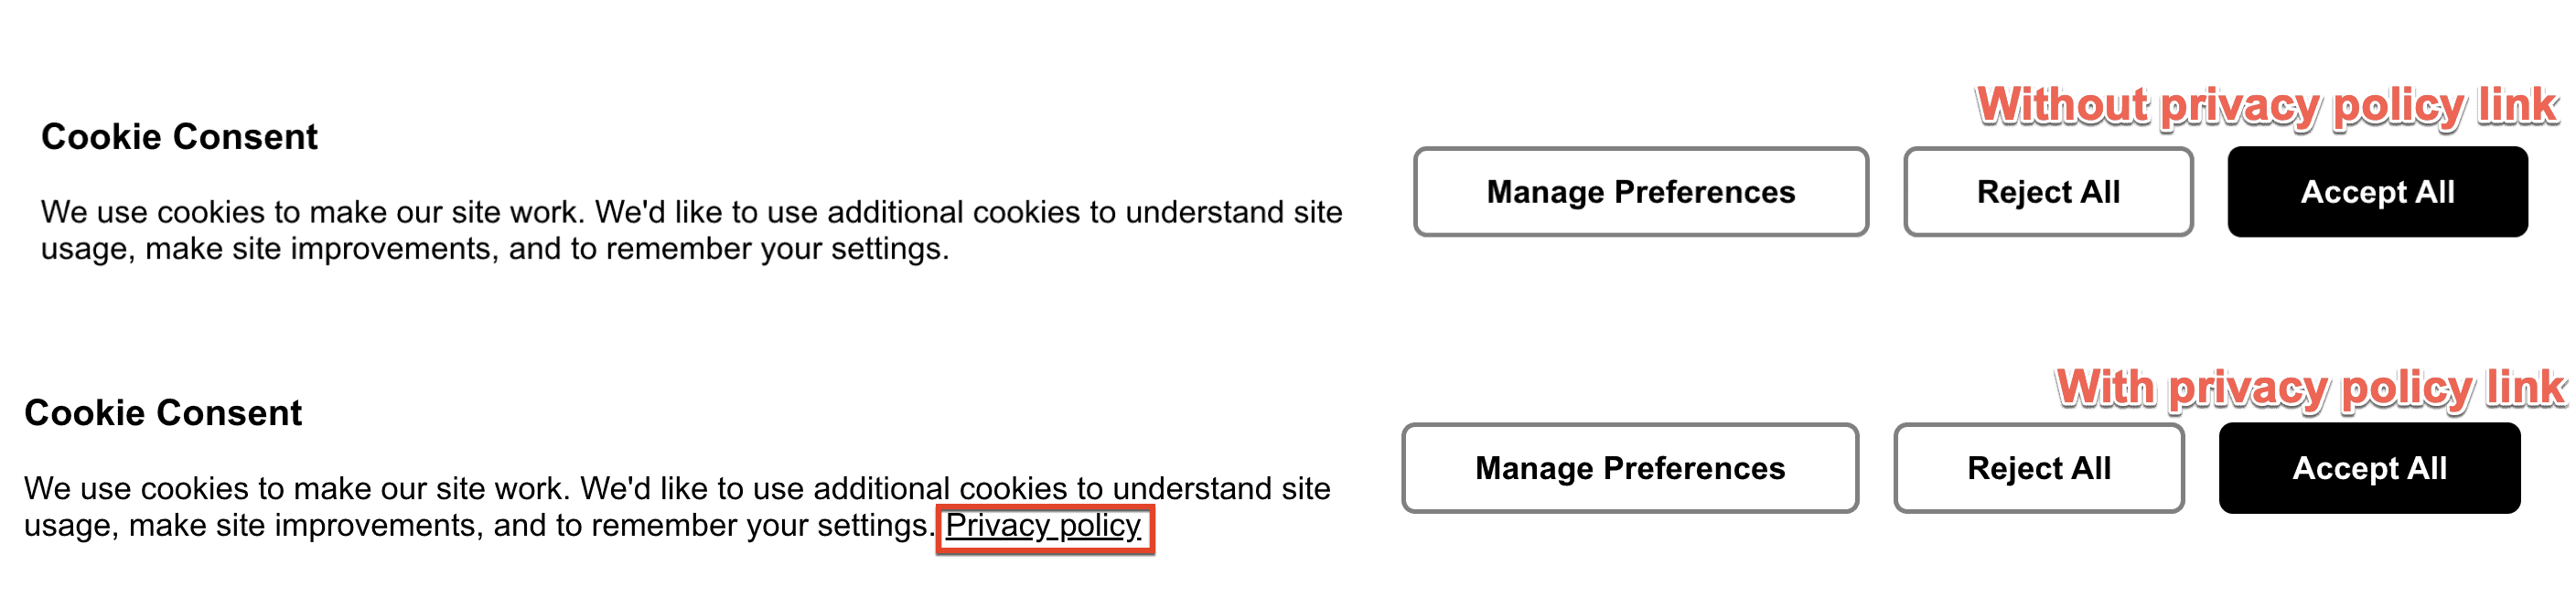
To add a privacy policy link,
- Navigate back to the banner page Cookie Banner.
- Next to your domain, click Cookie Policy Link.

- In the window that appears, add the link to your website's privacy policy page. Be sure to include https:// at the start of the URL.:

- Click Save to close the window.
- Click Publish at the top-right-hand corner to save the changes.
When you navigate back to your cookie banner on your live landing page, you'll see the privacy policy link included in the banner's message.
List of Consent Categories
The Manage Preferences button in your cookie banner provides your page visitors the option to control or customize their cookie settings based on their preferences.
Here is what each category entails:
Strictly Necessary: these cookies are necessary and essential for pages hosted on Unbounce to function.Experience Consistency: storage cookies that allow Unbounce to give returning visitors a consistent experience.- For example, if you're running an A/B or Smart Traffic test, Unbounce uses this cookie to ensure returning visitors receive the same page variant as when they first visited your page.
Analytics: also known as performance cookies, collect anonymized information about visitors, like which pages they visited and which links they clicked.Marketing: storage cookies that track visitors' activity to help advertisers deliver more relevant advertising or limit how often visitors will see an ad.- For example, this category will appear if you have Google Analytics, Google Tag Manager, or Google Ads enabled on your page(s).
Preferences: also known as functionality cookies, these cookies allow the browser to remember choices your visitors have made.- The
Preferencescategory will only appear in the Manage Preferences window if you have a custom script with thedata-consent-requiredattribute that asks your page visitors to manage this cookie. See the FAQ at the end of this article to learn more.
- The
Working with Google Consent Types & Cookies
The cookie banner from Unbounce helps you manage Unbounce cookies specifically.
However, if you want to manage non-Unbounce cookies, such as ones from Google Analytics, Google Tag Manager, or other platforms, then you'll need to follow a few extra steps.
Google Consent Categories
For example, here's how the different Google consent types relay back to Unbounce's cookies:
| Google Consent type | Unbounce consent categories |
ad_storage |
marketing |
analytics_storage |
statistics |
functionality_storage |
preferences |
personalization_storage |
marketing |
security_storage |
always granted |
For a detailed breakdown of what the different consent types entail in Google, see their documentation: Tag Manager consent types.
Managing Google Analytics Cookies
The Unbounce cookie banner can manage cookies and consent types (ad_storage, analytics_storage etc.,) from GA4.
For example, if your page visitor rejects the statistics cookie from the Unbounce cookie banner, theanalytics_storage cookie will not fire back to Google.
You can also use consent mode to ensure your page visitor's consent remains the same as they visit different pages. Learn more about consent mode here: Consent mode on websites and mobile apps.
Managing Google Tag Manager (GTM) Cookies
Similar to Google Analytics, the Unbounce cookie banner sets the GTM consent state for all the consent categories as "denied", except security_storage(which is necessary and always granted), until the visitor updates their consent preferences.
If you want to set up additional consent checks so other tags don't fire unless a page visitor grants access, you can enable consent mode in GTM: Consent configuration.
- Log into Google Tag Manager.
- Navigate to the Admin tab and click Container Settings:

- Under Additional Settings, tick the box to Enable consent overview:

- Click Save.
Next, navigate back to one of your Tags.
- Click on any tag to launch the Tag Configuration settings.
- Scroll down to locate the Consent Settings and Additional Consent Checks:

Here, you can set additional consent checks for your tag; in other words, your tag won't fire unless consent is given.
Third-party Cookies
Currently, we are unable to engage in the manipulation of third-party cookies. For example, our banner does not help your visitors manage consent for any cookies that come from somewhere else, such as ads.
This falls entirely outside the scope of Unbounce.
Frequently Asked Questions
Is there a way to make style changes to the cookie banner?
At this time, you cannot edit the styles (appearance or colors) of the cookie banner. Adding a link to your Privacy Policy page is the most edits you can make.
Does this feature work with custom cookies as well?
By default, Unbounce will apply a brute force method and wipe out any additional cookies to which the page has access whenever consent is removed from one or more categories.
Is it possible to change the language on the cookie banner?
The default language on the cookie banner is English. At this time, there is no in-app setting available to translate the cookie banner. If you would like to translate your cookie banner using a custom script, please contact our Support team.
How does consent impact Unbounce reporting? For example, if a visitor rejects or accepts consent?
For example, if your visitors reject the consistency cookie, the returning visitor will not see the same variant if they return to your page. Or rejecting the statistics means that counts for visitors and conversions will continue to increment, even for returning visitors.
My page sets custom cookies, and I want customers to have the option to reject or accept them — how can I do that?
You must add or modify the cookie type property within your page's script and add the data-consent-required property with one or more (comma-separated) Unbounce-specific consent categories.
Here's the source code, including an example:
You can install this script directly into Script Manager to apply it to all pages on a domain, or within the Javascripts widget in the Classic Builder.