Installing your Popup/Sticky Bar in Google Tag Manager
- In the Unbounce app, navigate to the Popup/Sticky bar Overview page that you’d like to install within Google Tag Manager.
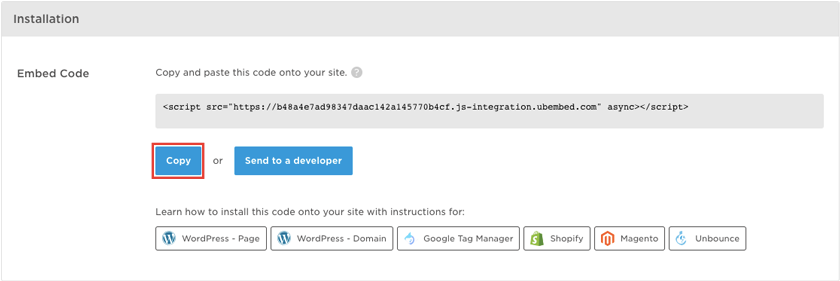
- Scroll down the page to the Installation panel. Click the Copy button to copy the embed code.
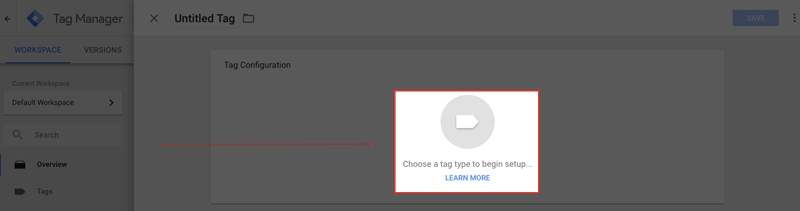
- Log in to your Google Tag Manager account and click the New Tag panel. A new screen will appear.

- Click the Choose a tag type to begin setup... icon. A new menu will appear from the right side of the screen.
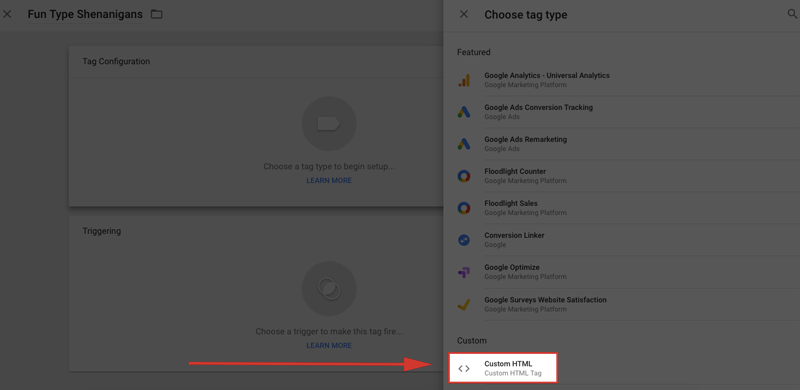
- From the Choose tag type menu, select the Custom HTML option. A new screen will appear.
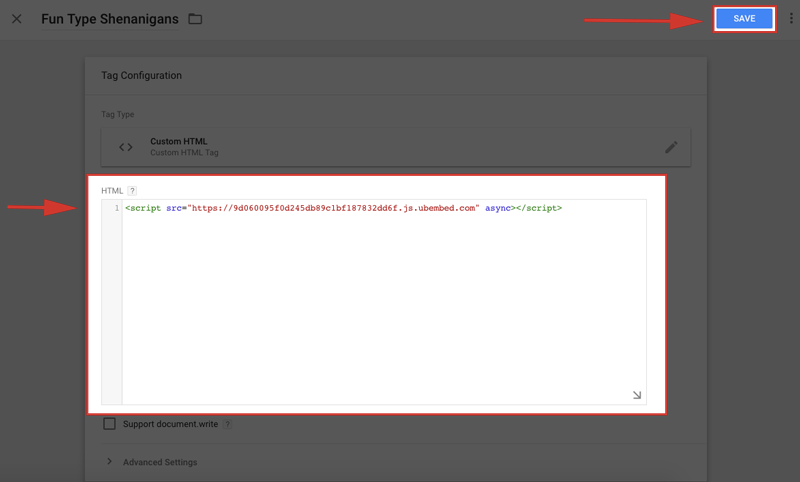
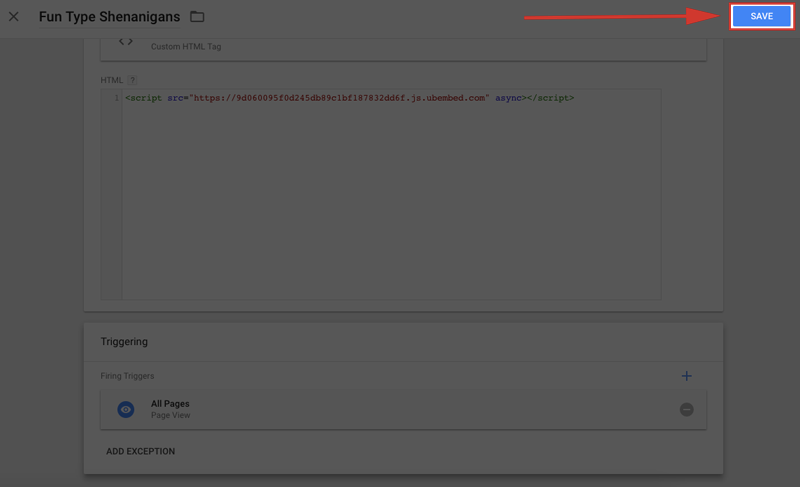
- Paste your Popup/Sticky Bar script into the Tag Configuration HTML blank field. Click the Save button in the top right-hand corner of the screen.
You’ve installed your Popup/Sticky Bar but now you’ll want to set up your event triggers before you publish. Choose between the following two options depending on what kind of event triggers you’d like to set up:
Option One: Trigger on All Pages
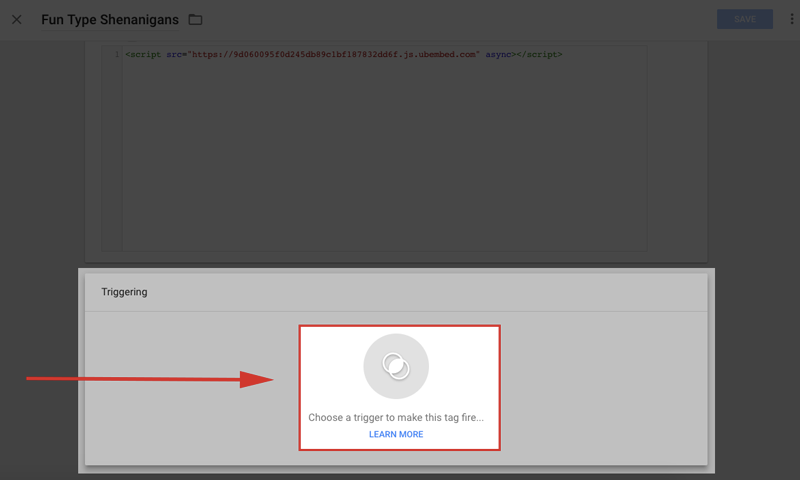
- Scroll down and click the Choose a trigger to make this tag fire... icon to set your trigger.
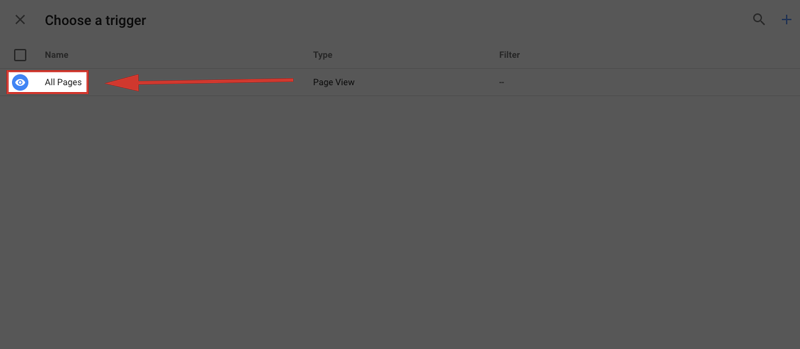
- Select the All Pages option on the left side of the screen.
- Click the Save button at the top right-hand corner of the screen to save your changes.
You’ve set up an all pages trigger event for your popup/sticky bar!
Option Two: Create a Custom Trigger
- Scroll down and click the Choose a trigger to make this tag fire... icon to set your trigger.
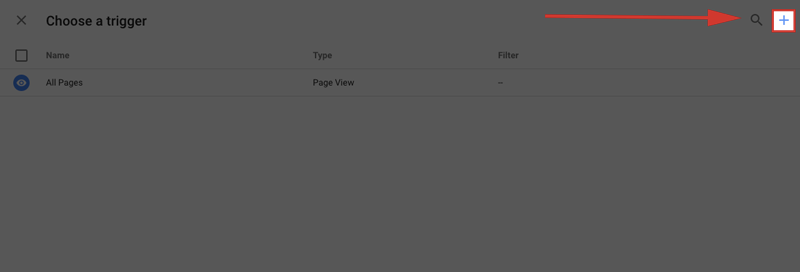
- Select the + sign at the top right-hand side of the screen. A new screen will appear.
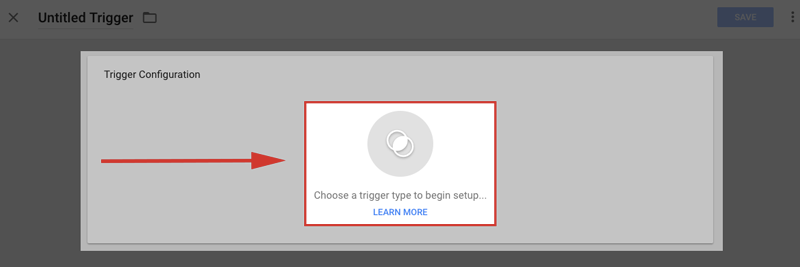
- Click Choose a trigger type to begin setup…. A new menu will appear on the right side of the screen.
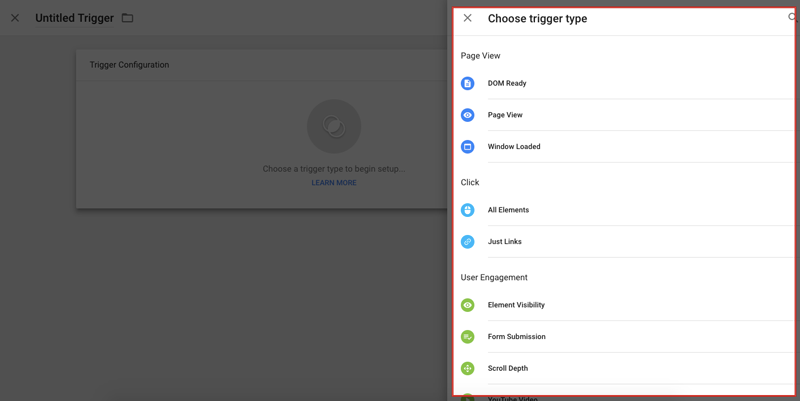
- Select the trigger type for which you’d like to set up a custom event. A new screen will appear.
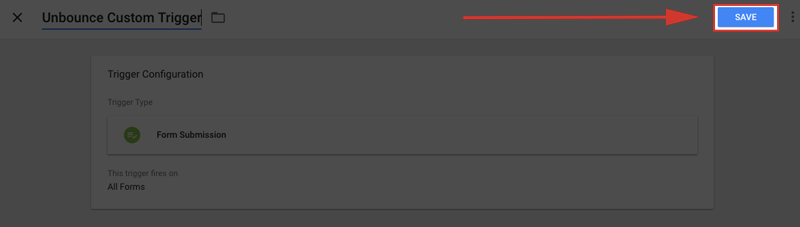
- Click the Save button at the top right-hand corner of the page.
You’ve set up a custom trigger event for your popup/sticky bar!